If you have a question to ask or an idea to share, we would love to hear from you. Share your thoughts with the Adobe Fresco Community.
- Adobe Fresco User Guide
- Introduction
- What's New in Adobe Fresco
- What is Adobe Fresco
- System Requirements for Adobe Fresco
- Release Notes for Adobe Fresco
- Adobe Fresco on the iPhone
- Keyboard shortcuts
- Accessibility in Fresco
- Adobe Fresco | Common questions
- Get started with the user interface
- Upgrade to a premium plan to access premium fonts
- Storage for Adobe Fresco
- Supported features on iPad and Windows devices
- Content authenticity (not available in mainland China)
- Draw, paint, animate, and share
- Layers
- Drawing aids in Adobe Fresco
- Basic shapes in Adobe Fresco
- Load basic shapes as selections
- Brushes overview in Adobe Fresco
- Pixel brushes
- Live brushes
- Vector brushes
- Mixer brushes
- Ribbon brushes
- Adjust pressure curve on stylus
- Colors
- Paint inside boundaries
- Apply motion to artwork
- Free Transform tool
- Magic Wand tool
- Pose tool
- Smudge tool
- Liquify tool
- Add and modify text
- Elements
- Publish, export, and share
- Layer masks
- Access Creative Cloud libraries in Fresco
- Ruler
- Erasers
- Add your own font
- Grids alignment
- Symmetry
- Adobe Fresco and Creative Cloud apps
- Cloud documents
- Troubleshooting
- Examples, ideas, and inspiration
Learn how to hide or reveal parts of a layer or layer group using layer masks and clipping masks.
Layer masks control the visibility of layers without editing the layer itself. Depending on the kind of effect you want to achieve, you can use either a layer mask or a clipping mask.
Layer mask controls the visibility of layers to which it is applied. Clipping mask allows you to create a mask by clipping one or more layers to another layer or layer group below.


How to create a layer mask
To create a layer mask:
- Select the layer for which you want to apply the mask.
- Tap the more actions
 icon on the Taskbar and choose Create empty mask.
 - Use the Reveal layer and Hide layer options as you paint on the mask to control the visibility of your drawing on the layer.
How to define the areas to mask
To define the areas you want to mask:
- Use the Selection tool from the tool bar to define areas that you want to mask.
- Use the Erase action on the Selection Actions bar to mask those areas.
To use a clipping mask:
- Create the object you want to use as the mask. You can use two or more layers as the mask.
- Create a new layer and paste or paint an object whose color or texture will fill into the first layer.
- Clip the two layers by tapping on clipping mask
 icon.
icon.
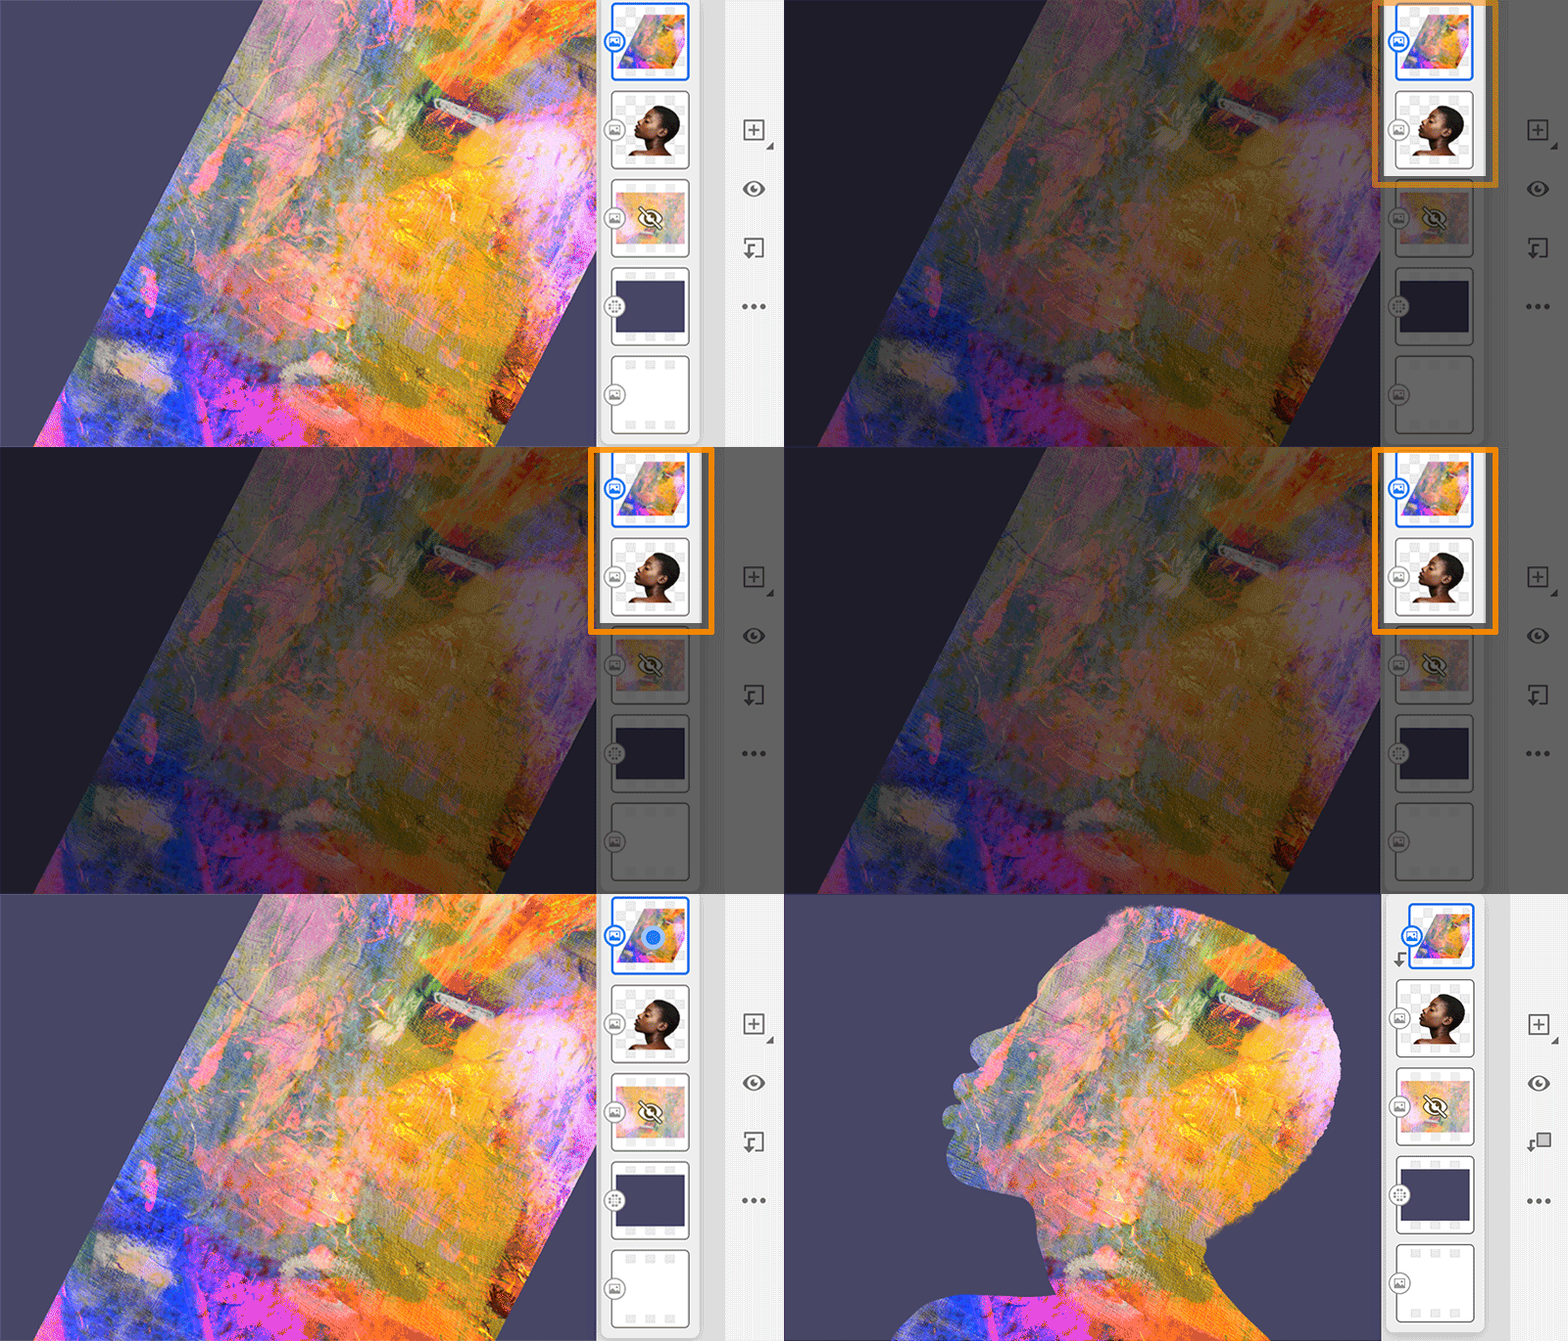
For example, in the image below, the first layer, a cutout portrait of a woman, is used as a clipping mask and the colourful texture layer is the upper layer. Now, when you select the two layers and then tap ![]() in the right pane, you get the colourful texture within the cutout portrait of a woman.
in the right pane, you get the colourful texture within the cutout portrait of a woman.


You can clip layers together, apply motion to them, and move it along a path to create more dramatic animations.
Tips and tricks
- When a layer mask is added, a small black dot appears on the left side of the layer mask thumbnail to indicate that a layer mask is associated with that layer.
- You can swipe between the layer and the layer mask to see how your mask edits are impacting the layer. If you want to switch from the layer mask to the layer, swipe right on the layer mask thumbnail. This makes the layer, rather than the layer mask, active so you can edit your drawing. The layer thumbnail becomes visible and active, the small black dot appears to the right of the thumbnail.
- By default, a layer and its mask are linked. You can unlink them if you want to resize or move the layer mask.
- You can reveal the hidden parts and hide the visible parts in one action by using the Invert Mask action.
- You have more than one ways of masking, either apply a mask to the entire layer or using the Lasso
 tool select and then create a mask from that selection.
related resources
Talk to us