Working with materials
This page describes the management of UVs and materials for Substance models in Substance model graphs.
Defining materials
Meshes generated in Substance model graphs do not have material information by default. This information needs to be set by the user using the following nodes:
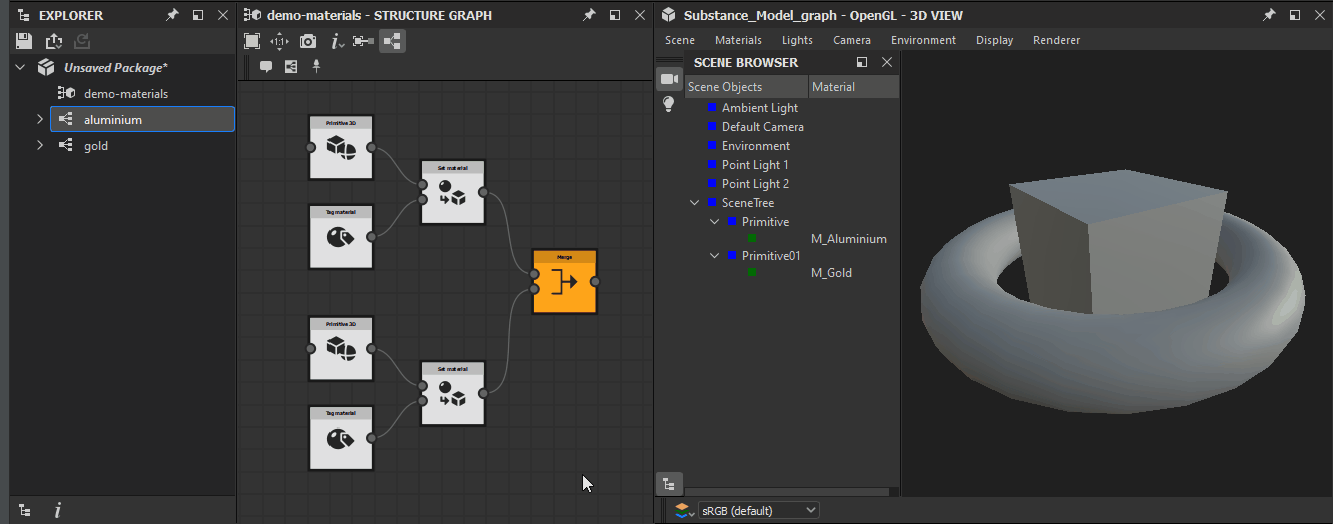
- Tag material: creates a material with a custom name and color, and outputs it as part of a Scene
- Set material: applies the material in the Scene connected to the Material input onto Items in the Scene connected to the Geometry input

Applying materials
You can connect the output of Substance graphs as found in Substance 3D files (SBS) or Substance 3D asset files (SBSAR) to the materials of Substance models using the same steps you may use to apply graph outputs to any other mesh in the 3D View. There are several ways to apply Substance graph outputs on Substance models materials:
From the Explorer panel
- Click RMB on a Substance graph Item
- Select the View Outputs in 3D View option in the contextual menu
- If more than one material is defined on the mesh currently rendered in the 3D View, select the target material in the second contextual menu
OR
- Drag and drop a Substance graph Item on the 3D View
- If more than one material is defined on the mesh currently rendered in the 3D View, select the target material in the contextual menu
From the Graph view (Substance graphs only)
- Click RMB on empty space in the graph
- Select the View Outputs in 3D View option in the contextual menu
- If more than one material is defined on the mesh currently rendered in the 3D View, select the target material in the second contextual menu
OR
- Click RMB on a node OR drag and drop any node on the 3D View
- If more than one material is defined on the mesh currently rendered in the 3D View, select the target material in the contextual menu
- Select the target usage for the selected material in the submenu (this step does not apply if the node has multiple outputs with usages matching the target material)
Managing UVs
To apply textures on meshes, we need a coordinate space which can map 2D pixel coordinates in images to 3D coordinates on the mesh, in order to let the rendering engine know where each pixel of the image should be applied on a mesh. This coordinate space is commonly referred to as UV space, and 3D artists call the mapping of a mesh in this space as the UVs of the mesh.
Since a 3D mesh needs to be textured in 2D space, the polygons need to be laid out on a flat (2D) surface. In most cases, this requires cutting the mesh in portions which can be flatly laid out with a minimal amount of distortion – see planispheres for a common example of this concept. These cut portions are commonly called UV islands.
Several nodes are available in the Library to manage the UVs of meshes generated with Substance model graphs. These nodes are the following:
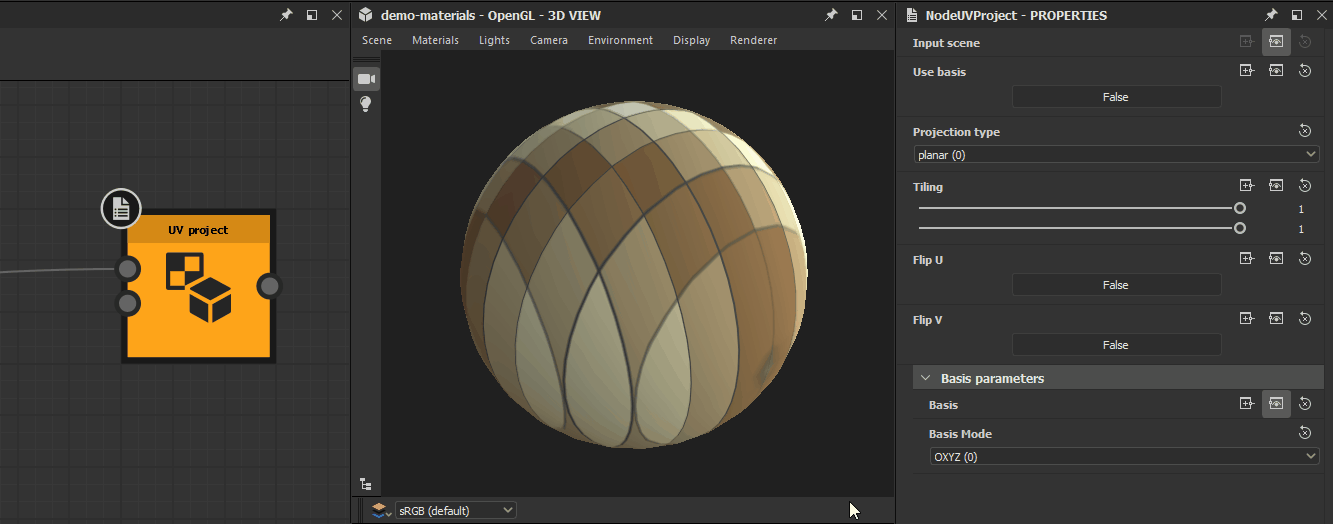
- UV project: generates UVs for Items in a Scene, using a projection method selected by the user
- UV transform: performs a transformation – such as translation, scaling and rotation – on the current UVs of Items in a Scene
- UV stretch: scales the current UVs of Items in a Scene to equalize texel density
- Jitter UV: applies a random amount of translation, rotation and scaling to UVs per Item in a Scene