Select Roto Brush in the toolbar.
Alternatively, you can also use keyboard shortcuts:
- Windows: Alt + W
- macOS: Option + W
Separate a foreground object from a background using Roto Brush and create mattes using Refine Matte.
Separating a foreground object from a background is a crucial step in many visual effects and compositing workflows. When you have created a matte that isolates an object, you can replace the background, selectively apply effects to the foreground, and much more.
Use Roto Brush to draw strokes on representative areas of the foreground and background elements. After Effects uses that information to create a segmentation boundary between the foreground and background elements.
After creating the segmentation boundary, use Refine Brush Matte properties to improve the matte.
The Refine Matte effect is also available separately for improving mattes created using features other than the Roto Brush tool.
In the latest version of After Effects, new Object Matte tools expand rotoscoping beyond a brush-only workflow. You can quickly select a subject using AI, refine the matte with manual tools when needed, and automatically propagate the result across frames.
The following Object Matte tools are available to support and refine your rotoscoping and masking workflows:


The Object Matte Tool icon replaces the RotoBrush icon in the main toolbar in the latest version of After Effects (Beta).
Learn how to use Next-Gen Roto Brush 3 in Adobe After Effects.
Next-Gen Roto Brush is the latest and improved version of the Roto Brush tool powered by a brand-new AI model. It offers enhanced precision during the selection and tracking of objects in footage over time and space compared to Roto Brush 2. This makes masking complex objects such as overlapping limbs, hair, and transparencies quick and easy.


Traditional rotoscoping uses animated masks to isolate an element in a video clip, which can be tedious and time-consuming. Roto Brush 2 uses artificial intelligence to track your subject’s movement so you can cut down on frame-by-frame refinement.
The propagation banner is displayed in both the Layer and Composition panel, which contains the layer to which Roto Brush is applied. If you have the Layer panel closed, and you're working on something else, you still see the propagation progress.
The Roto Brush & Refine Edge span shows a light gray chevron pattern, and the base frame is a bright green box at the beginning. When you propagate the frames, green color chevrons display in the middle of the span. For more information, see Strokes, Spans, and Base frames.
The classic controls, such as Motion Threshold and Motion Damping, aren’t enabled by default. You can enable them by selecting Enable Classic Controls under the Roto Brush & Refine Edge effect. You can use the features of both the Roto Brush versions together to get the most out of your rotoscoping.
If you're familiar with Roto Brush 1, selecting objects with the Next-Gen Roto Brush and Roto Brush 2 propagation engine is essentially the same.
The default rotoscoping option is Next-Gen Roto Brush. However, if you prefer the older versions - Roto Brush 1 or Roto Brush 2, you can select it using the Version dropdown in the Roto Brush & Refine Edge effect panel.
Select Roto Brush in the toolbar.
Alternatively, you can also use keyboard shortcuts:


Double-click an existing layer in the Composition panel. This opens up the layer in the Layer panel.
Select a frame to start from.
Avoid frames where the object is hidden by other objects in the scene. For example, for a person walking in and out of frame, choose a frame where they’re entirely in the scene.
Ensure you've selected the Version as 3.0 for Next-Gen Roto Brush or 2.0 for Roto Brush 2 under the Roto Brush & Refine Edge effect in the Effect Controls panel.


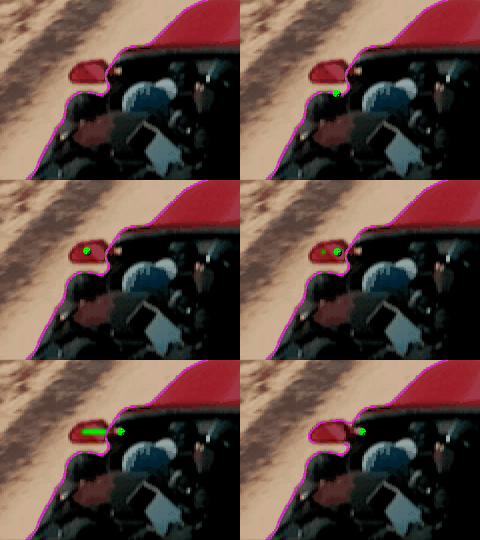
Paint a green foreground stroke on the subject, object, or region you’re attempting to rotoscope.


Do's:
Don'ts:
By default, there’s a green cross over the mouse cursor. It's a best practice to set the appropriate brush size before making your first stroke. The brush size is visible in green before you start with your first stroke. To change the size, select Windows > Brushes, and adjust the diameter of the brush.
You can also hold Ctrl (Windows) or Command (macOS) and drag left and right to change the size of the brush.
Refine the selection.
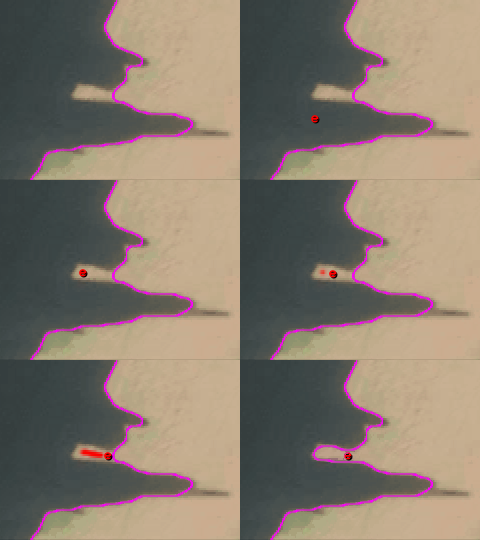
Paint extra strokes, or paint background strokes by holding Alt or Option to remove portions of the selection. Draw strokes around the edges that you want to remove. The magenta line that surrounds the object starts to get refined.
If you cut a little extra, release Alt or Option and drag over the area to add to the selection. The indication is that the cursor is green during addition. When drawing a background stroke, the Roto Brush tool's pointer is a red circle with a minus sign in the middle.


Once the base frame is set, start the propagation.
You can start propagation by:
The main difference between pressing the spacebar and moving the CTI is that the spacebar propagates and then displays the results per frame. Moving the CTI waits for frames to propagate, then displays results.
As Roto Brush propagates the matte from frame to frame, the selection may include unwanted regions or "lose" portions of the original selection. To correct this, paint a background stroke (holding Alt or Option) on the first frame where the unwanted change occurs to remove unwanted regions or paint a new foreground stroke to include anything missed. As with the base frame, avoid painting across the edge of the selection as much as possible.
You can resize the Roto Brush tool’s tip to make finer strokes. Broad strokes are best for initial work, but fine strokes are useful for details. (See Roto Brush strokes, spans, and base frames.)
Freeze the propagation.
After propagating the matte through all the video frames, freeze the propagation using the Freeze button at the bottom of the Layer panel.


After freezing, you can continue to make adjustments to the matte without re-propagating. If you must add or remove from a selection after freezing, you can unfreeze the propagation with the same button.
It would be best if you only freeze once you’re satisfied with the Roto Brush matte. What freezing does is that it locks the matte in place so that Roto Brush doesn’t have to re-propagate the edges.
If After Effects has already calculated Roto Brush segmentation information for a frame when you select the Freeze button, then this information is cached. If the segmentation hasn’t been calculated for a frame within a Roto Brush span, then After Effects must calculate the segmentation before freezing.
Frames with frozen (cached and locked) segmentation information are represented by:


If you select Stop in the Freezing Roto Brush dialog box, After Effects stops adding frames to the cache, but Roto Brush segmentation is still locked with the segmentation information cached up until the point that you clicked Stop.
To unfreeze Roto Brush segmentation, select the Freeze button again.
When Roto Brush segmentation is frozen, you can place the pointer over the Freeze button to view a tooltip that tells you when the cached information was created.


When Roto Brush segmentation is frozen, the pointer for the Roto Brush tool has a slash through it.
The information cached and locked results from Roto Brush strokes and the properties in the Propagation property group of the Roto Brush & Refine Edge effect. Making changes to any of these items (for example, by drawing new Roto Brush strokes or modifying properties in the Propagation property group) doesn’t influence the result of the Roto Brush effect until you unfreeze segmentation. The properties in the Roto Brush Matte property group aren’t frozen.
Frozen Roto Brush segmentation information is cached and locked while the application is running, and the cached information is saved with the project.


To use Refine Edge Tool, select the Roto Brush Tool in the Toolbar and choose Refine Edge Tool. You can use Alt + W (Windows) and Option + W (macOS).


Use the toggles at the bottom of the Layer panel to view the matte results, or open the Composition panel to view the result in-context with other layers.
The latest After Effects has significantly improved the workflow with Roto Brush 2 and Roto Brush 3. There's no need for After Effects to recalculate each frame during the Freeze step. Instead, it intelligently caches inference for already propagated frames. This translates to a faster Freeze process and more efficient extraction of objects from footage, saving you valuable time.
You can choose these view modes from the Show Channel menu in the Layer panel, by clicking the buttons in the Layer panel, or by using keyboard shortcuts. You can use the controls at the bottom of the Layer panel to change the color and opacity of the overlays used in Alpha Boundary and Alpha Overlay mode.


Alpha
Shows alpha channel of the layer. Use Alt + 4 (Windows) or Option + 4 (macOS).
Alpha Boundary
Shows the source layer with foreground and background unchanged, with the segmentation boundary overlaid as a colored outline. Use Alt + 5 (Windows) or Option + 5 (macOS).
Alpha Boundary view mode is turned off when the View menu in the Layer panel is changed to anything other than Roto Brush.
Alpha Overlay
Shows the source layer with the foreground unchanged and the background overlaid with a solid color. Use Alt + 6 (Windows) or Option + 6 (macOS).
When you first draw a Roto Brush stroke, the frame you're drawing becomes a base frame. The segmentation information (the information about what is defined as foreground and what is defined as background) defaults to the entire duration of the layer or to the duration of any empty durations if multiple spans are present. The range of frames thus influenced by this base frame is its Roto Brush span. Little arrows in the span bar in the Layer panel show the direction in which the information is being propagated. If you draw a corrective stroke anywhere where the arrows point to the right, the information from that stroke is propagated forward; if you draw a corrective stroke anywhere where the arrows point to the left, information from that stroke is propagated backward. If you draw a stroke anywhere outside a Roto Brush span, you create a new base frame and span.
You can work your way forward a frame at a time from a base frame, making corrective strokes, and you don't have to worry about your strokes changing results on frames that you've already worked on. You can do the same thing going backward from a base frame.
The influence of each corrective stroke propagates forward or backward to affect all frames in that direction within the span, regardless of when the stroke is made. For example, if the base frame is at frame 10, you make a corrective stroke at frame 20, and then you make a corrective stroke at frame 15, then frame 20 will be affected by both of these corrective strokes—as if you had made the corrective strokes in the other order.
Each time that you make a stroke within a span, the span grows unless it can't because the span in which you're drawing is next to another span:
To manually change a span duration, drag either end of a span.
To delete a span, right-click (Windows) or Control-click (macOS) a span and choose Remove Span.
To delete all spans, delete the instance of the Roto Brush & Refine Edge effect.
In Next-Gen Roto Brush and Roto Brush 2, there is a propagation banner at the bottom of the Layer panel, which gives the status of the current propagating frame.


The Roto Brush Tool is similar in many ways to the paint tools, though it also has several important differences.
When the Roto Brush Tool is selected, controls in the Paint panel are disabled. Roto Brush strokes have a duration of one frame, though their influence propagates forward or backward within a span.
You can change the brush size (Diameter) for the Roto Brush tool in the same way that you change it for the paint tools. You can use the Diameter control in the Brushes panel or Ctrl-drag (Windows) or Command-drag (macOS) in the Layer panel. Other controls in the Brushes panel do affect the Roto Brush tool, with the exception of Hardness.
You can copy Roto Brush Path properties and paste them into masks, shapes, and instances of the Paint effect, just like you can with other kinds of paths. If you copy an individual stroke, the Roto Brush span information is not copied; however, if you copy the entire Roto Brush effect instance, it includes the Roto Brush span (and base frame) information.
You can use expressions on the Roto Brush effect's Path property in the same manner as the Paint effect's Path property.
When drawing a stroke with the Roto Brush Tool, a new stroke is created even if another stroke is selected. This differs from the stroke replacement functionality for the paint tools.
Roto Brush strokes are in a Strokes property group within the Roto Brush & Refine Edge property group in the Timeline panel.


Many keyboard shortcuts that work with paint strokes and paint tools also work with Roto Brush strokes and Roto Brush Tool.
The Roto Brush & Refine Edge effect properties in the Propagation property group affect segmentation between foreground and background and how that segmentation information is used for contiguous frames in a span. Other properties of the Roto Brush effect affect the matte generated based on the initial segmentation. The Refine Edge Matte effect includes all of the properties of the Roto Brush effect outside the Propagation property group (except for Invert Foreground/Background).
Select from the Roto Brush versions - 1.0 (Classic), 2.0, or 3.0.


Select the quality of detailing around the edges when version 2.0 is selected. Standard is faster and doesn’t have quite as much detail around the edges. Best is refined around the edges.


Properties in the Propagation property group (except for View Search Region) affect all Roto Brush calculations. Any change to these properties requires a recalculation and propagation of the segmentation information from a base frame. Also, the results on a base frame itself are not affected by changes to these properties; therefore, it’s best to change these properties when the current-time indicator is a frame or two away from a base frame so that you can see the result of the changes.


Inverts which strokes are considered foreground strokes and which strokes are considered background strokes in the segmentation phase of the Roto Brush & Refine Edge effect.
Use this to refine edges, reduce chatter, shift edges, work on contrast, and feather the selection.
Feather
Define the softness of the segmentation boundary.
Contrast
Increase the contrast (useful for tightening up the boundary further).
Shift Edges
Either expand (positive value) or decrease (negative value) the segmentation boundary.
Reduce Chatter
Chatter is seen when the edges of your segmentation boundary move erratically. Reduce Chatter reduces visible noise along the edges of your segmentation boundary and gives you cleaner edges.
Render Refine Edge allows viewing the refined edge of your Roto Brush results. It works for both base frames and propagated frames.
Base Refine Edge Radius lets you expand the area of the refined edges you’ve already created with the Refine Edge Roto Brush tool. Use it to expand the area of the refined edges when you have used a brush that is too small to help After Effects calculate the refined edges between frames.
Enable Fine-tune Refine Edge Matte for options for fine-tuning the edges you have created with the Refine Edge Tool.
Smooth
Increasing this value reduces the sharpness of the curves in the segmentation boundary by smoothing along the edge. Leave this number low when isolating an object with sharp features like hair.
Feather
The softness of the segmentation boundary. This property does nothing if Smooth is 0. In contrast to Smooth, Feather applies across the edge.
Contrast
Increase the contrast (useful for tightening up the boundary further).
Shift Edges
Either expand (positive value) or decrease (negative value) the segmentation boundary.
Reduce Chatter
Increase this property to reduce erratic changes to edges from one frame to the next. This property determines how much influence the current frame should have when performing a weighted average across adjacent frames to make the matte edges not move erratically from one frame to the next. If the Reduce Chatter value is high, the chatter reduction is strong, and the current frame is considered less. If the Reduce Chatter value is low, the chatter reduction is weak, and the current frame is considered more. If the Reduce Chatter value is 0, only the current frame is considered for matte refinement.
If the foreground object isn’t moving, but the matte edges are moving and changing, increase the value of the Reduce Chatter property. If the foreground object is moving, but the matte edge isn’t moving, decrease the value of the Reduce Chatter property.
Check this option to render the matte with motion blur. The high-quality option is slower but generates a cleaner edge. You can also control the number of samples and the shutter angle, which have the same meaning as they do in the context of motion blur in the composition settings.
Extend Where Smoothed
Only functional when Reduce Chatter is greater than 0 and Decontaminate Edge Colors is selected. Edges that are moved to reduce chatter are cleaned.
Increase Radius
(In Roto Brush 1, it's named Increase Decontamination Radius): Amount (in pixels) by which to increase the radius value for the cleaning of edge colors, in addition to any cleaning that covers feather, motion blur, and extended decontamination.
View Map
(In Roto Brush 1, it’s named View Decontamination Map): Shows which pixels will be cleaned by decontamination of edge colors (white pixels in the map).
When the View menu in the Layer panel is set to Roto Brush, a Freeze button appears in the lower-right corner of the Layer panel. Select this button to cache and lock segmentation for all Roto Brush spans for the layer within the composition work area. This preserves the matte and saves it with the project, preventing the Roto Brush effect from recalculating the segmentation when you open the project again or make changes.
When drawing strokes to define a foreground object with the Roto Brush Tool, begin by drawing strokes along the center of the object’s features. For example, draw a stroke along the skeleton rather than along the outline of an arm. After Effects can then extrapolate from those regions to determine where the boundaries are.
If you draw a Roto Brush stroke over the wrong area of the image, undo that stroke. However, if After Effects misinterprets your stroke and includes or excludes too much of the image, don’t undo it; further teach Roto Brush by drawing additional strokes to include or exclude regions.
Work with resolution set to Full when using the Roto Brush tool
Fast Previews modes, such as Adaptive Resolution, don’t work well with Roto Brush because switching resolutions requires recalculation of the segmentation information. Fast Previews modes are turned off when you draw a Roto Brush stroke.
Use the Roto Brush tool in a composition with a frame rate set to match the frame rate of the layer's source footage item,
A warning banner appears at the bottom of the frame in the Composition panel if the frame rate of the composition does not match the frame rate of the layer's source footage item.
By default, the controls available to you in Roto Brush 1 can be activated in Next-Gen Roto Brush and Roto Brush 2 by selecting the Enable Classic Controls option. The procedure to use it's essentially the same as Next-Gen Roto Brush and Roto Brush 2.


Create stunning 3D animations in After Effects
Animate characters and illustrations, add motion to text, and more.