- Adobe XD User Guide
- Introduction
- Design
- Artboards, guides, and layers
- Shapes, objects, and path
- Text and fonts
- Components and states
- Masking and effects
- Layout
- Videos and Lottie animations
- Prototype
- Create interactive prototypes
- Animate prototypes
- Object properties supported for auto-animate
- Create prototypes with keyboard and gamepad
- Create prototypes using voice commands and playback
- Create timed transitions
- Add overlays
- Design voice prototypes
- Create anchor links
- Create hyperlinks
- Preview designs and prototypes
- Share, export, and review
- Share selected artboards
- Share designs and prototypes
- Set access permissions for links
- Work with prototypes
- Review prototypes
- Work with design specs
- Share design specs
- Inspect design specs
- Navigate design specs
- Review and comment design specs
- Export design assets
- Export and download assets from design specs
- Group sharing for enterprise
- Back up or transfer XD assets
- Design systems
- Cloud documents
- Integrations and plugins
- Work with external assets
- Work with design assets from Photoshop
- Copy and paste assets from Photoshop
- Import or open Photoshop designs
- Work with Illustrator assets in Adobe XD
- Open or import Illustrator designs
- Copy vectors from Illustrator to XD
- Plugins for Adobe XD
- Create and manage plugins
- Jira integration for XD
- Slack plugin for XD
- Zoom plug-in for XD
- Publish design from XD to Behance
- XD for iOS and Android
- Troubleshooting
- Known and fixed issues
- Installation and updates
- Launch and crash
- Cloud documents and Creative Cloud Libraries
- Prototype, publish, and review
- Import, export, and working with other apps
Learn how to use artboards to create your design projects in XD.
Meet Jeanee, a graphic designer who has been chosen to lead a UX design project. She is pitching Adobe XD to her team, the members of which have varying levels of expertise with UX design and tools.


- She is looking for resources to quickly help her get started with the project.
- She needs tutorials to get her started and sample files to learn on-the-go.
Jeanee is training herself on basic design terminologies and working with artboards to create her first prototype in XD. Read on to learn how we can help her get started.
Before you proceed
Look at the basics of XD:
Set up artboards in 4 easy steps
What is an artboard? Artboards represent the screens in your application or pages in your website. It streamlines the design processes and creates interactive designs for multiple screen sizes in a single document. Use artboards to create your XD project.
Read on to learn how you can set up your artboards.
Create a new artboard
Adobe XD provides you with artboards for popular screen sizes such as those for different versions of iPhones, iPads, and Web. You can create a custom artboard if the choices do not meet your requirements.
Home screen
Use the preset artboard sizes or create your custom artboard.


XD app
Use the Artboard tool ![]() to create additional artboards.
to create additional artboards.


Select an artboard preset from the Property Inspector, or drag on the canvas to create a custom artboard.
Use an existing artboard from Photoshop and Illustrator
You can import existing artboards from Photoshop or Illustrator into XD without having to recreate them.


Use File > Import from XD to open up Photoshop or Illustrator artboards in XD with every artboard and layer intact and editable.
Check out this article that describes about top 5 ways to use Photoshop assets in XD.
With XD 57 and later versions, you get consistent colors when you use an existing asset with an sRGB color profile from Photoshop and Illustrator into an XD document with an sRGB color profile. If the XD document has an Unmanaged color profile, you get a message that prompts you to switch the color profile to sRGB.
Manage artboards
Changed your mind about the artboard size? Resize them. You can also rename them based on your design needs. Want to create more artboards and manage their placement? Duplicate and rearrange them.
Rename


Double-click the artboard title.
Resize


Drag the circular handle that appears on the edges of an artboard.
Duplicate


Select the artboard and press Ctrl /Cmd + D.
Align and Distribute


Select multiple artboards and click Align and Distribute in the Property Inspector. Drag the artboard around to rearrange them.
Apply layout or square grids
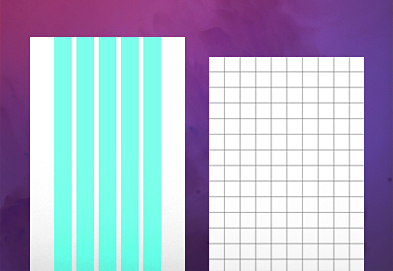
Want to define the underlying structure of your design content added within artboards? Apply Layout grids. Want to get an idea on how to measure quickly and align your design content while laying out objects or text on your artboards? Use Square grids.
Layout grids


Select one or more artboards and in the Grid section of the Property Inspector, choose Layout.
Square grids


Select one or more artboards and in the Grid section of the Property inspector, choose Square.
Design artboards
Now that you have created your first artboard, learn how to add visual and text elements, change the background, and create scroll effects.
Add visual and text elements
Now that your basic artboard is in place, you can create or modify the background color, add graphics, and create or format text styles into reusable assets. Want to create an editable grid of repeated elements? Use Repeat Grids.
Add visual and text elements


Use Drawing tools to create custom elements or select File> Import to import existing elements such as images and icons from your device folder. Use Text tools to create, format, and capture text styles into reusable assets.
To change the background color of the artboard, from the Property Inspector, select Fill and apply color from the color picker.
Create repeatable elements


Use repeat grids to create objects with repeatable elements such as lists and card-based layouts.
Create scrollable artboards
Want to add vertical and horizontal scroll effects in your design? Use scroll groups to prototype a window of content.
Do you want to achieve a realistic simulation of scrolling on desktop and mobile? Set the fixed position of an element on the artboard to allow other elements to scroll beneath.
Vertical scrolling


To extend the artboard beyond the viewport height, use the marker. The marker indicates the position till which you need to scroll to access the content.
Fix position when scrolling


To pin the design elements to a fixed position, select Fix position when scrolling in the Property Inspector.
The final design
Now that you know enough about artboards, you can play around with what you’ve learned so far and create more amazing artboards for your design projects.


Go ahead and download the final design to view how your design project looks.
Learn more
Here is a sample 4-minute video to get started. You can also download the sample files to try alongside the videos.
Tips and tricks
Now that you've got the basics of artboards in XD, here are some handy tips and tricks:
- To measure the distance of an object from the edges of an artboard, click the object and press the Option (on macOS) or Alt (on Windows) keys.
- To turn OFF the scroll option in an artboard, select the artboard and in the Property Inspector, change Scrolling to None.
For more pro tips on working with artboards, follow @Elainecchao, XD Product Manager on Twitter.
What's next?
We've got you started with creating, managing, and sharing artboards. Take a step forward and learn how to create custom artboard guides and position your artboard using grids.
Have a question or an idea?
If you have a question to ask or an idea to share, come and participate in Adobe XD Community. We would love to hear from you and see your creations.


