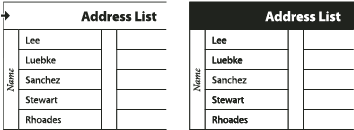
When you select part or all of the text in a cell, that selection has the same appearance as would text selected outside a table. However, if the selection spans more than one cell, the cells and their contents are both selected.
If a table spans more than one frame, holding the mouse pointer over any header or footer row that is not the first header or footer row causes a lock icon to appear, indicating that you cannot select text or cells in that row. To select cells in a header or footer row, go to the beginning of the table.
Note
To switch between selecting all of the text in a cell and selecting the cell, press Esc.

Note
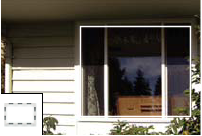
You can also select a table in the same way you select an anchored graphic—place the insertion point immediately before or after a table, and then hold down Shift while pressing the Right Arrow key or Left Arrow key, respectively, to select the table.
The new cells have the same formatting as the text in the row in which the insertion point was placed.
Note
You can also create a new row by pressing Tab when the insertion point is in the last cell.
The new cells have the same formatting as the text in the column in which the insertion point was placed.
New rows are added to the bottom of the table; new columns are added to the right side of the table.
Note
You can also change the number of rows and columns using the Table panel. To display the Table panel, choose Window > Type & Tables > Table.
When adding columns, if you drag more than one and one‑half times the width of the column being dragged, new columns are added that have the same width as the original column. If you drag to insert only one column, that column can have a narrower or wider width than the column from where you dragged. The same behavior is true of rows, unless the Row Height for the row being dragged is set to At Least. In this case, if you drag to create only one row, InDesign will resize the new row, if necessary, so that it’s tall enough to contain text.
-
Hold down the mouse button, and then hold down Alt (Windows) or Option (Mac OS) while dragging down to create a new row, or to the right to create a new column. (If you press Alt or Option before holding down the mouse button, the Hand tool appears—so make sure you begin dragging before you press Alt or Option.)
Note
Dragging to insert rows or columns doesn’t work at the top or left edges of a table. These fields are used to select rows or columns.
Note
Dragging to insert rows or columns doesn’t work at the top or left edges of a table in horizontal tables, or at the top or right edges of a table in vertical tables. These fields are used to select rows or columns.
- To delete a row, column, or table, place the insertion point inside the table, or select text in the table, and then choose Table > Delete > Row, Column, or Table.
- To delete rows and columns by using the Table Options dialog box, choose Table > Table Options > Table Setup. Specify a different number of rows and columns, and then click OK. Rows are deleted from the bottom of the table; columns are deleted from the right side of the table.
Note
In a vertical table, rows are deleted from the left side of the table; columns are deleted from the bottom of the table.
- To delete a row or column by using the mouse, position the pointer over the border of the bottom or right side of the table so that a double-arrow icon (
 or
or  ) appears; hold down the mouse button; and then hold down Alt (Windows) or Option (Mac OS) while dragging either up to delete rows, or to the left to delete columns.
Note
If you press Alt or Option before holding down the mouse button, the Hand tool will appear—so press Alt or Option after you begin dragging.
- To delete cell contents without deleting cells, select the cells containing the text you want to delete, or use the Type tool
 to select the text within the cells. Press Backspace or Delete, or choose Edit > Clear.
A table assumes the width of the paragraph or table cell in which it is created. However, you can change the size of the text frame or table so that the table is wider or narrower than the frame. In such a case, you can decide where you want the table to be aligned within the frame.
Use the Tab or arrow keys to move within a table. You can also jump to a specific row, especially useful in long tables.
- Press Tab to move to the next cell. If you press Tab in the last table cell, a new row is created. For information on inserting tabs and indents in a table, see Format text within a table.
- Press Shift+Tab to move to the previous cell. If you press Shift+Tab in the first table cell, the insertion point moves to the last table cell.
Note
The first cell, last cell, previous cell, and next cell differ depending on the writing direction of the story. For horizontal writing, the first cell is in the upper left corner, the last cell is in the lower right, the previous cell is the cell to the left (the previous cell of a cell on the left edge is the rightmost cell on the row above), and the next cell is the cell to the right (the next cell of a cell on the right edge is the leftmost cell on the row below). For vertical writing, the first cell is in the upper right corner, the last cell is in the lower left, the previous cell is the cell above (the previous cell of a cell on the upper edge is the bottom cell of the row on the right), and the next cell is the cell below (the next cell of a cell on the lower edge is the top cell of the row on the left).
-
Press the arrow keys to navigate within and between table cells. If you press the Right Arrow key when the insertion point is at the end of the last cell in a row, the insertion point moves to the beginning of the first cell in the same row. Similarly, if you press the Down Arrow key when the insertion point is at the end of the last cell in a column, the insertion point moves to the beginning of the first cell in the same column.
-
If you press the Down Arrow key when the insertion point is at the end of the last cell in a row in a vertical table, the insertion point moves to the beginning of the first cell in the same row. Similarly, if you press the Left Arrow key when the insertion point is at the end of the last cell in a column in a vertical table, the insertion point moves to the beginning of the first cell in the same column.
When text is selected within a cell, cutting, copying, and pasting actions are the same as for text selected outside a table. You can also cut, copy, and paste cells and their contents. If the insertion point is in a table when you paste, multiple pasted cells appear as a table within a table. You can also move or copy the entire table.
-
To embed a table within a table, place the insertion point in the cell where you want the table to appear, and then choose Edit > Paste.
To replace existing cells, select one or more cells in the table—making sure that there are sufficient cells below and to the right of the selected cell—and then choose Edit > Paste.
When you convert a table to text, the table lines are removed and the separator you specify is inserted at the end of each row and column.
Note
If the pasted rows use different formatting than the rest of the table, define one or more cell styles, and then apply the cell styles to the pasted cells. Hold down Alt (Windows) or Option (Mac OS) while clicking the cell style to override existing formatting.
Anne-Marie Concepcion provides an article about combining tables at Joining Tables.
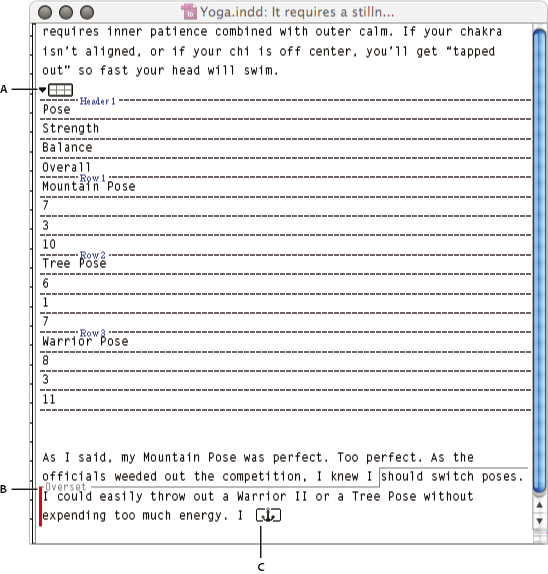
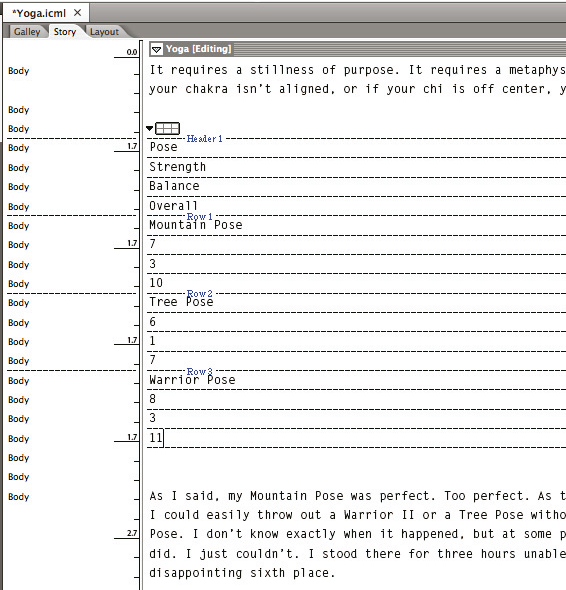
When you choose Edit > Edit In Story Editor, tables and their contents appear in Story Editor. You can edit tables in Story Editor.

A. Table icon B. Overset graphic
To expand or collapse the table in Story Editor, click the triangle to the left of the table icon at the top of the table.
To determine whether the table is sorted by rows or columns, right-click (Windows) or Ctrl-click (Mac OS) the table icon and choose Arrange By Rows or Arrange By Columns.
Use Layout view to modify and format the table. You cannot select columns or rows in Story Editor.

To expand or collapse the table in Galley or Story view, click the triangle to the left of the table icon at the top of the table.
To determine whether the table is sorted by rows or columns, right-click (Windows) or Ctrl-click (Mac OS) the table icon and choose Arrange By Rows or Arrange By Columns.
Use Layout view to modify and format the table. You cannot select columns or rows in Galley or Story view.

